Elevated crossing shanty
Developing a kit

Well, I bought this expensive laser cutter to produce our QuickSticks laser cut tie templates and they seem to keep the machine plenty busy during the day. Naturally, I wanted to work on some laser cut buildings for my layout.
I quickly found out that as good as lasers are for cutting precise parts for buildings, it is very impractical to make a single structure with one. By time you develop the cad work and prove the design, it would have been quicker to just make the thing from scratch. It is not unrealistic to spend 50-100 hours on just the cad work on a simple building. It is very difficult and time consuming, and I have had several thousand hours of experience in cad design (maybe thats the problem!).
But, nonetheless, I decided to develop some laser cut buildings that I will use on my own layout, and offer them commercially. I spent several hours with a friend of mine, Clark Kooning, designing a simple laser cut building kit, more or less to learn how to do this and get the results I want. We came up with a very nice little building, but again, spent at least 100 hours doing it. We have since scaled that building to N, S and O scales.
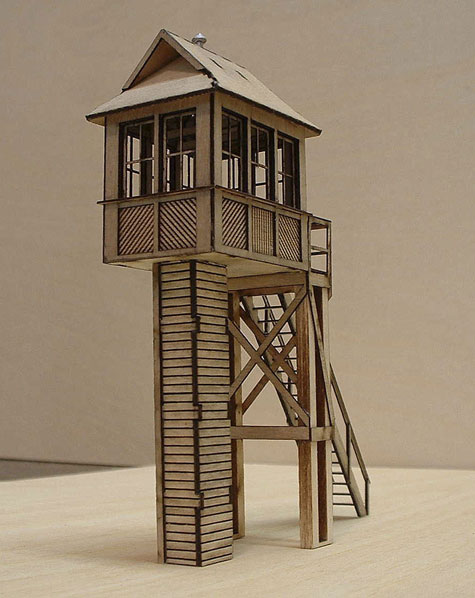
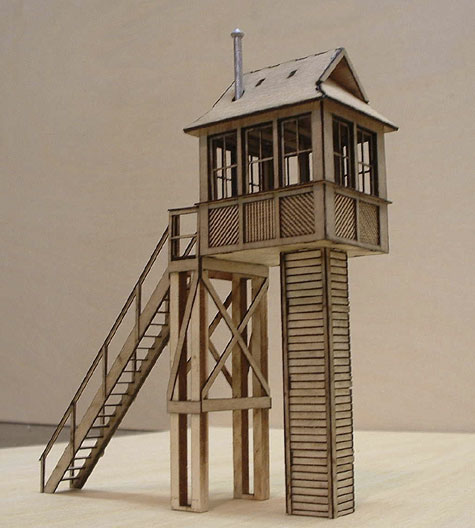
Falling back on this experience, I went to work on the building shown above. This is an elevated crossing shanty that once stood on Ridout St. in London Ontario, I worked form a picture in a book by Ian Wilson, Steam Through London, and managed to come up with this structure. As soon as I saw the picture in the book I liked it.
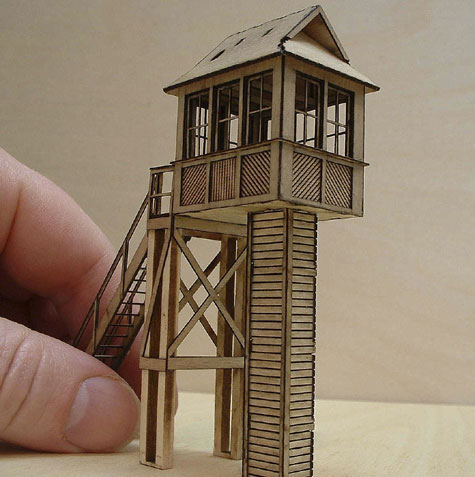
Spending several evenings in the last few weeks I came up this this design. The majority of the building is cut from 1MM thick plywood (.040″), which makes for a very solid structure, that is less prone to warping when painted. The trim is cut from .5 mm ply (.02″). It is very easy to build as I spent plenty of extra time adding tabs to make construction simple. The entire design was done in 3D, which makes a building like this possible. After spending the time on this that it took, I have lots of respect for the draftsmen that would develop a building like this in full size. I guess they could not do it in 50-70 hours all alone though….
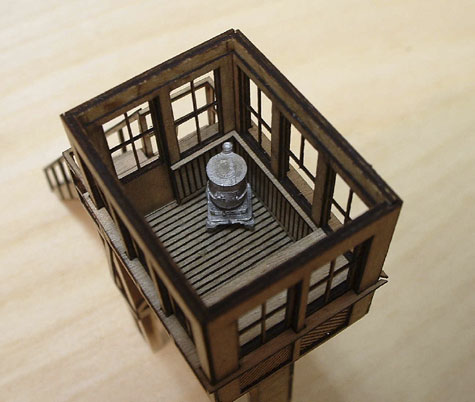
The roof is a sub-assembly that is easily removable. There is a full interior with this kit too. Today I ordered 60 pot bellied stove castings (in HO) to include in the initial run. I added wainscoted walls, trim and baseboards to the inside. Plus a desk, I am looking for a chair casting that will suit the building too. The prototype had a bell on the front as well, I will see if I can find one of these too.
Overall I am pretty jazzed about this project, the first off that I built looks great, very fine detail. Shortly I will have these available online to order…
Posted by: | 03-16-2005 | 09:03 PM
Posted in: Uncategorized | Comments (8)