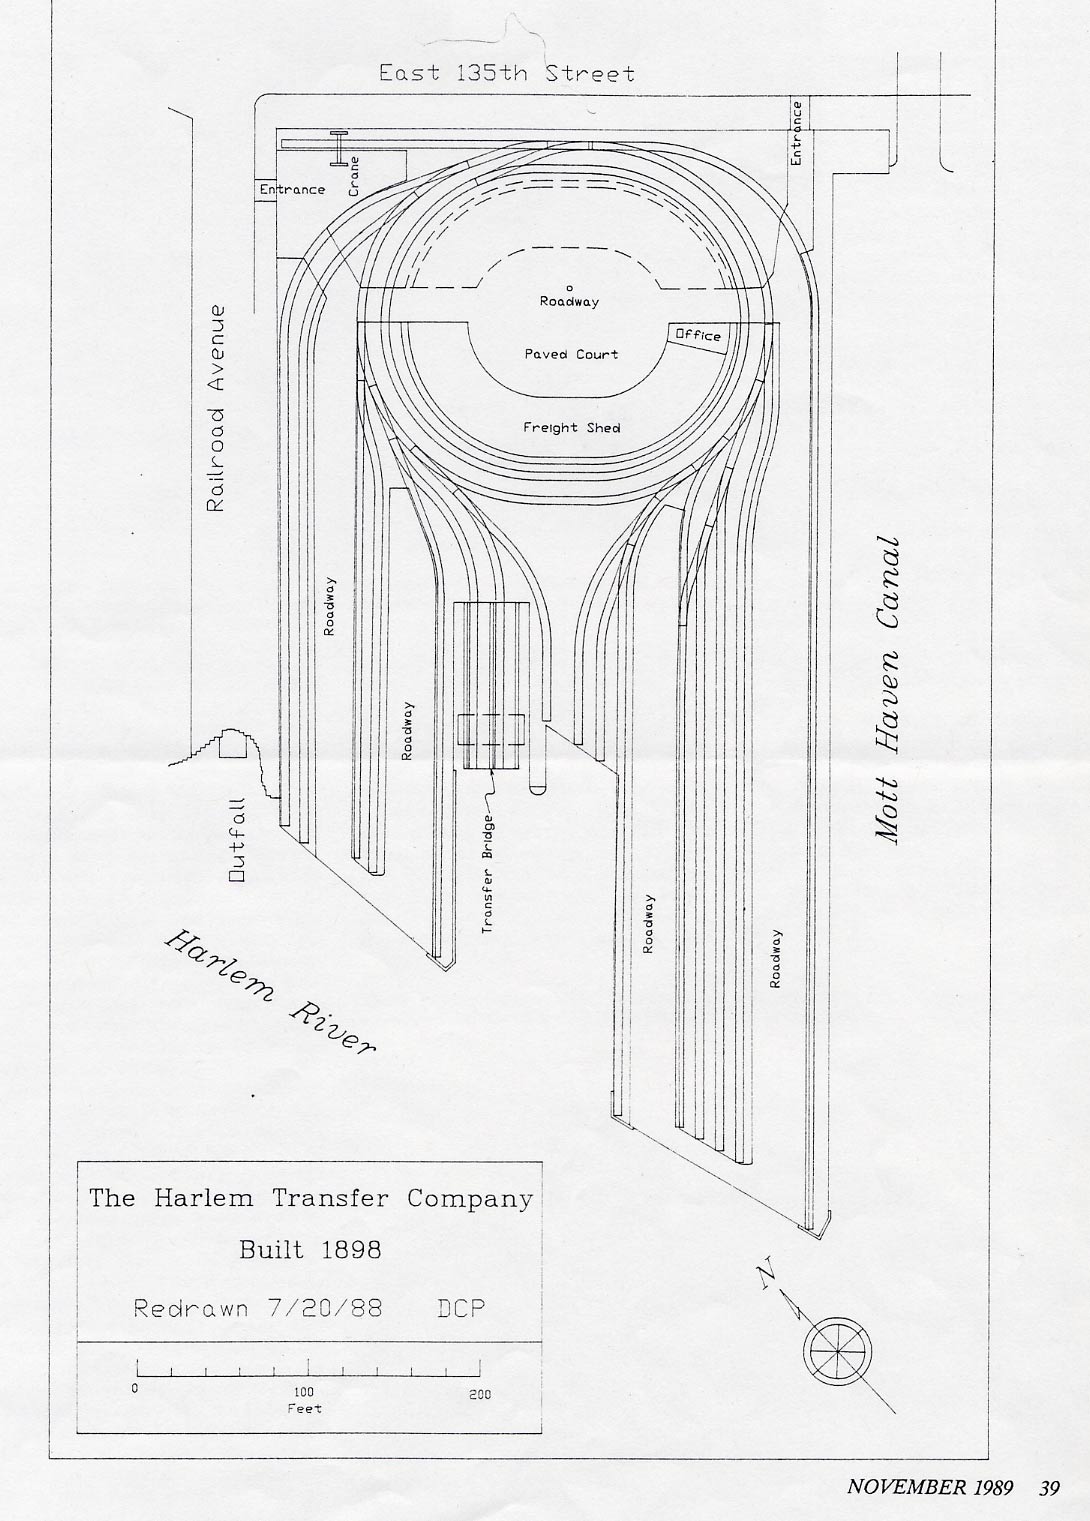
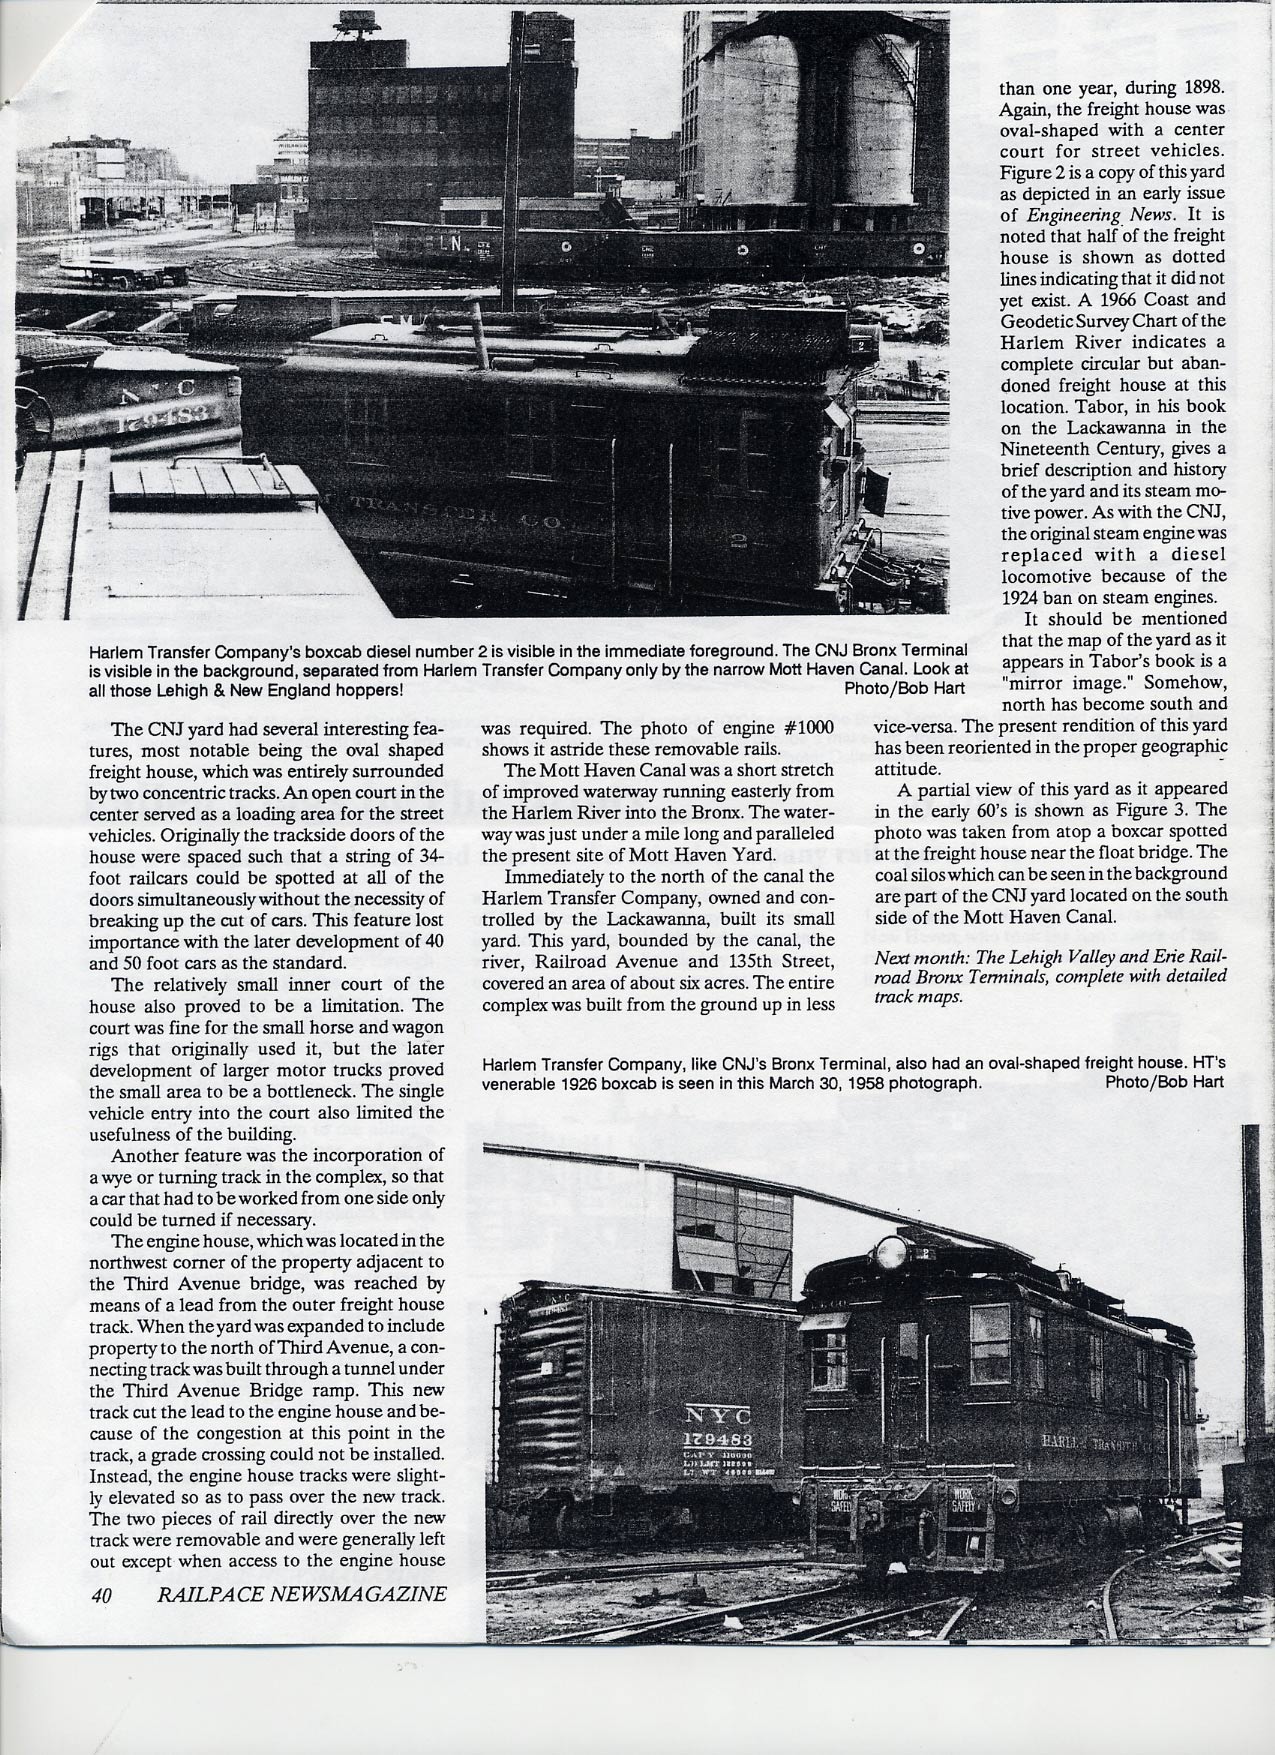
A bit of weathering
Dirtying up some shiny new cars…
Lately I have been buying a few of the Atlas ready to run reefers that they offer in a wide variety if schemes. I love these things, very detailed and nicely painted, they roll great too. The couplers they use leave a bit to be desired, I don’t know why every manufacturer just doesn’t use Kadees…
I thought I would weather up one of them, they are just too shiny looking. I have a bunch now and intend on weathering all of them and replacing the couplers with Kadees as time permits.
Here are some shots of the results of the first one, with an unweathered one for comparision…
Image copyright 2005. Tim Warris
Image copyright 2005. Tim Warris
I prefer to use an airbrush to do my weathering. For this car I started with an over spray of Floquil’s Weathered Black, I use Floquil paint for everything on my layout. I just prefer the quality of the paint, the fact that it goes on almost dry, and I can spray it right out of the bottle. Finding it is getting more and more difficult, so I have quite a stockpile of the stuff.
Following a light over spray of Weathered Black to dull down the entire car, I use a lighter grey color, like Primer, and add a line of “dust” along the bottom of the car and ends. Carefully observing old steam era photographs one notices the cars back then were more “dusty” then greasy and rusty like they are today, and a good layer of dust is appropriate.
To this I add some drybrushing with a light grey paint, on the trucks and grab irons. Everything I model gets lightly drybrushed when complete, the details will come to life with this step.
Using some leather dye diluted in rubbing alcohol, I carefully and lightly add some streaks along the edge of the roof to simulate rain weathering.
I have some powdered weathering chalks in several shades of grey, using these I “streaked” the lettering on the entire car to simulate the fading and running of the painted logo, making the car look like its been around for a while.
I remove the wheels from the trucks and paint these with Grimy Black, clean up the treads and axles and replaced them in the trucks.
Thats it, a couple of new couplers are added, always after all the painting is done, since they work best in their “pristine” condition, and the car is ready to add to the roster!
Posted by: | 01-08-2005 | 09:01 AM
Posted in: Uncategorized | Comments (0)