Car ferry addition continued
Work is progressing on the addition of the dock for the car ferry
Since is it hot, stinking hot, here this week, I decided to hide in the basement for the afternoon and work some more on the dock addition. Don’t let anyone try to tell you that Canada is the Great White North, in the summer, with the humidity it gets unbearably hot where I live, which is usually when I get the most work done on the layout.
The dock that will accompany the car ferry slip is fairly big, about 6 feet long and four tracks wide. It will be used as a bit of a yard to store cars destined for the ferry and points beyond. There will also be the inbound and escape track for the line into the area, with two turnouts built right onto the dock.
I absolutely love dock scenes on layouts, and have always looked forward to adding another one to mine. This is a fairly ambitious scene, but there is a larger one planed for another part of the layout in the future.
Having a laser cutter I wanted to make the most of it for the grunt work of building a dock. The plan was to engrave the dock boards, spike holes and track outline for the entire dock surface. This worked ok, but I was unhappy with the results…
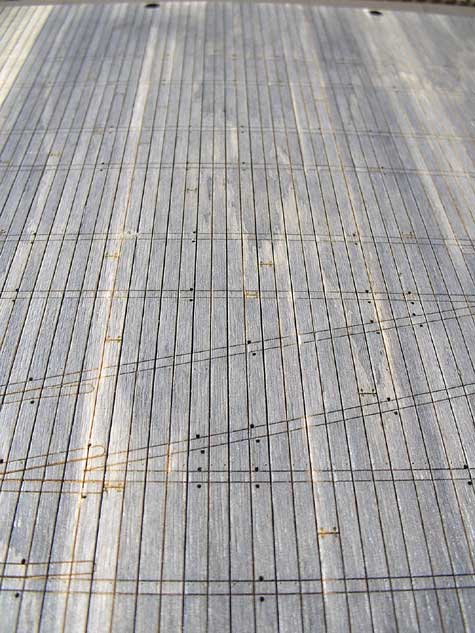
Image copyright 2005 Tim Warris
There are two things about this attempt I did not like. One was that I made the nail holes too small, and therefore they did not show up well when the wood was stained. The other was the fact that this was done on a solid piece of 2mm thick plywood, which I had thought would look great, but in reality did not. The large wood grain on the sheet of plywood was very noticeable and at a distance looked like the dock was made from a solid piece of wood, which of course it was, but I certainly did not want it to look like it was.
I definitely did not like this result and went to work to find an alternative to it. I really didn’t want to plank the dock with thousands of individual boards, so I came up with a solution that gave me this result.

Image copyright 2005 Tim Warris
Its hard to tell from the photos, but the results of the second attempt are much better looking.
What I decided to do was cut strips of plywood two planks wide each, with all the nail and board details cut into them. I cut 250 of these to make up the 6′ length required for the dock.
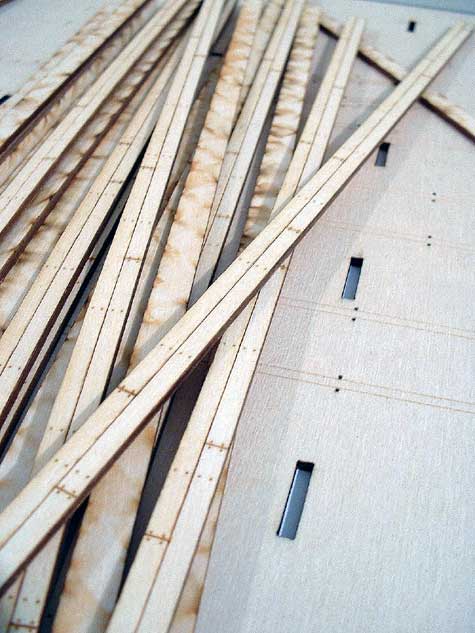
Image copyright 2005 Tim Warris
These were all given a base stain of Leather Dye and 99% Isopropyl alcohol, mixed to a density I thought looked right. I have no idea what the ratio ended up being, just played with it until I liked it.
Using an old cookie sheet I dropped each piece in one at a time and wiped off the excess with my fingers, and set them aside to dry.
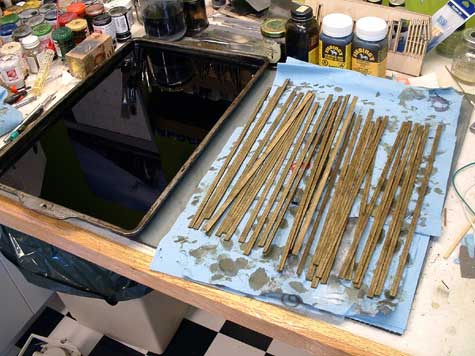
Image copyright 2005 Tim Warris
It took about 2 hours to do all 250 pieces.
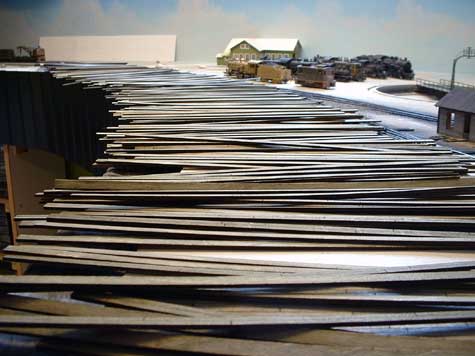
Image copyright 2005 Tim Warris
Next, to simulate individual boards, I went in with a brush and darkened a few of the boards on each piece with a darker mixture of the stain. This also took about two hours to complete all the pieces…
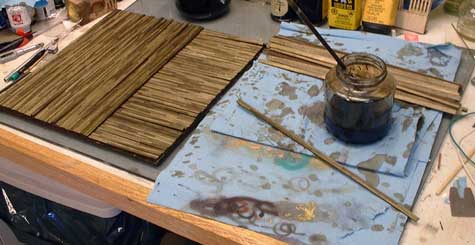
Image copyright 2005 Tim Warris
To build the dock I am going to use a base layer, cut on the laser from plywood, that has tabs cut into it that will allow me to insert plywood supports from underneath. There will be a “skirt” around the dock, so underneath will not be visible and therefore will not require a lot of piles to be placed. The small rectangular cutouts are for the tabs that will be on the top of the plywood support pieces. These will form an “eggcrate” type of base that the entire dock will sit on.
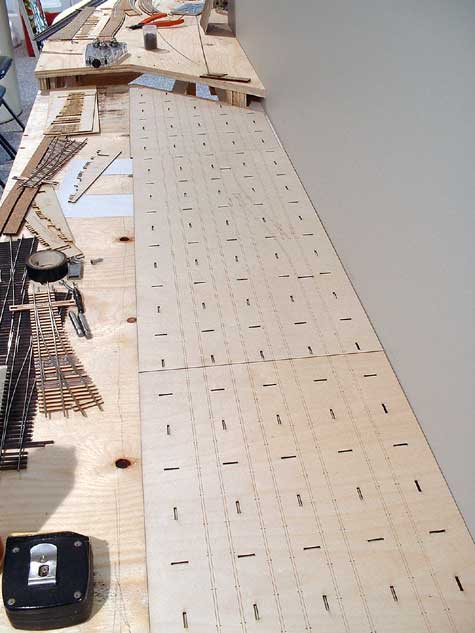
Image copyright 2005 Tim Warris
Onto this will be the individual boards. Once glued on, I will lightly sand the entire surface to lighten up the wood a bit and help show the lines between the boards and all the nail holes. I will then put the whole thing back into the laser to engrave the outline of the rails, and cut all the spike holes (this was also done on the base piece as can be seen in the picture above). Once this is done I can simply spike the rail in place using pre-drilled holes as a guide. This will even work for the two turnouts that will be on the dock.
I will post some more shots as I go a long, and since the forecast for tomorrow is more heat, I think I might get something accomplished….
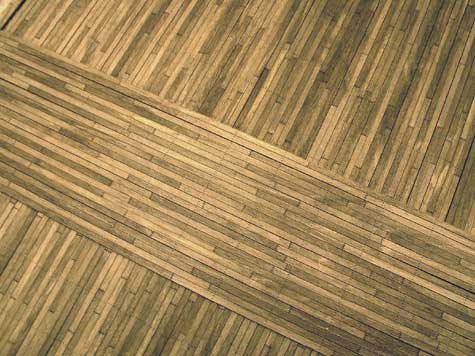
Image copyright 2005 Tim Warris
Posted by: | 06-11-2005 | 08:06 PM
Posted in: Uncategorized